In previous tutorial, we have quickly gone through how to load or program HEX file onto LPC2148 MCU using Flash Magic. This post is all about how to Create new Keil project for ARM7 LPC2148 Microcontroller. We’ll cover each and every step one by one. To keep simplicity we’ve provided text as well as video. You can follow anyone according to your comfort. Installation of MDK-ARM Keil uVision4 is pretty straight forward. We just have to fill form and get setup file. Evaluation version of Keil for ARM is available to download click here.

MDK-ARM Keil µVision:
This is free software (evaluation version) which solves many of the pain points for an embedded system developer. This software is an Integrated Development Environment(IDE), which integrated text editor to write program, a compiler and it will convert your source code into HEX file. Here is simple guide to start working with Keil µVision which can be used for:
- Writing programs in C/C++ or Assembly
- Compiling and assembling programs
- Debugging programs
- Creating HEX, AXF and BIN file
- Test program without real hardware
Here is step by step guide to create fresh new project for ARM7 LPC2148 Microcontroller using MDK-ARM µVision4.
- Once we’ve installed Keil, click on Keil µVision4 icon. This will appear on desktop after installation Keil.
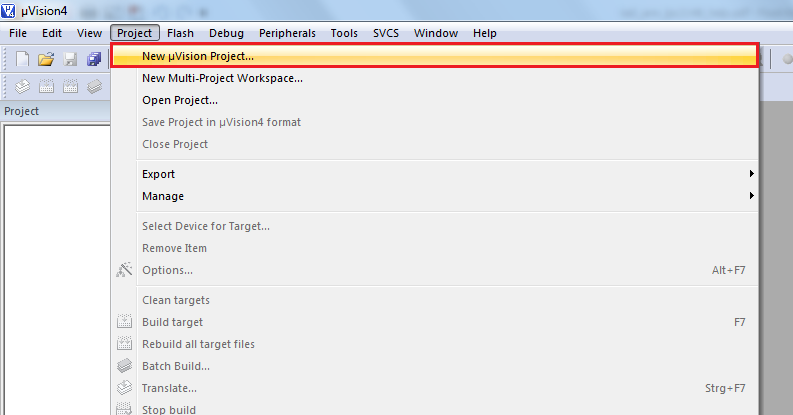
- Click on Project menu, and then hit on New uVision Project
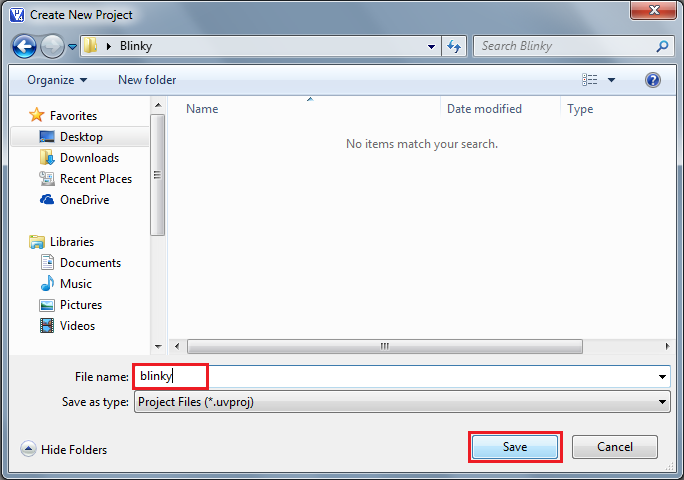
- Create new project folder named as Blinky.
- Select target Device vendor. In this case NXP (founded by Phillips)
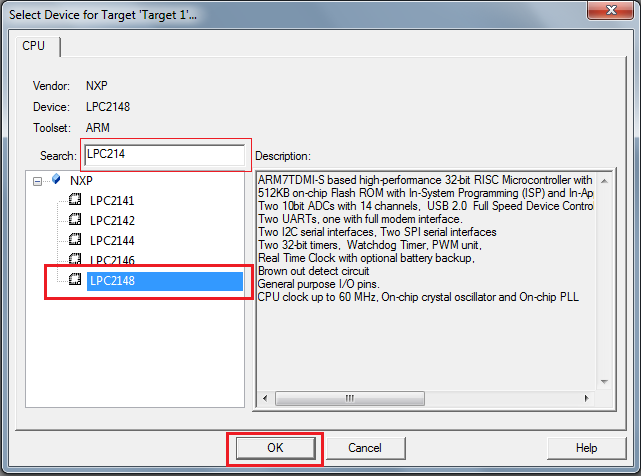
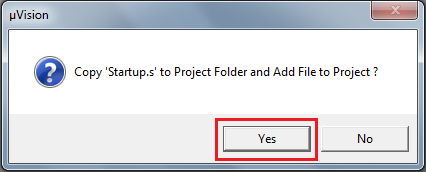
- Expand NXP icon and select specific chip i.e. LPC2148 After this, a dialog box will pop-up on screen. This will ask you whether to copy startup code for LPC2148. Click on Yes.
- Then we’ll get basic workplace to get start with writing code in. When we expand Target1 in left project pane. We see Startup.s is already added which is necessary for running code in Keil.
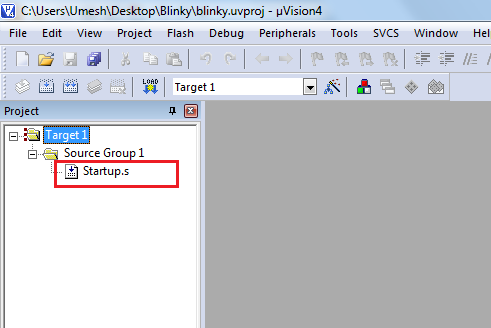
NOTE:
code will not run without Startup.s file. Because startup code executes immediately upon reset of the target system and performs the following listed operations.
- Defines interrupt and exception vectors
- Configures the CPU clock source (on same device)
- Initializes the external bus controller
- Copies the exception vectors from ROM and RAM for systems with memory remapping
- Initializes other low level peripherals, if necessary
- Reserves and initializes the stack for all modes
- Reserves the heap
- Transfers control to the main C function
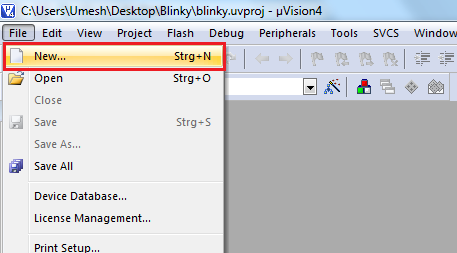
- Now click on File menu and hit on New.
- Write code to blink LED in C and FileName.c Save. NOTE:Don’t forget to save as with .c extension
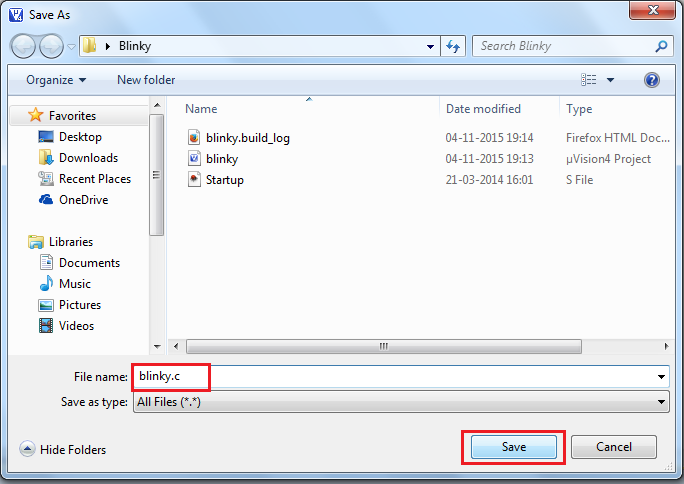
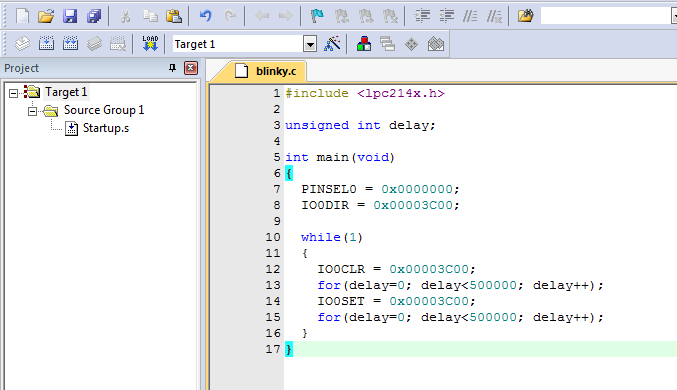
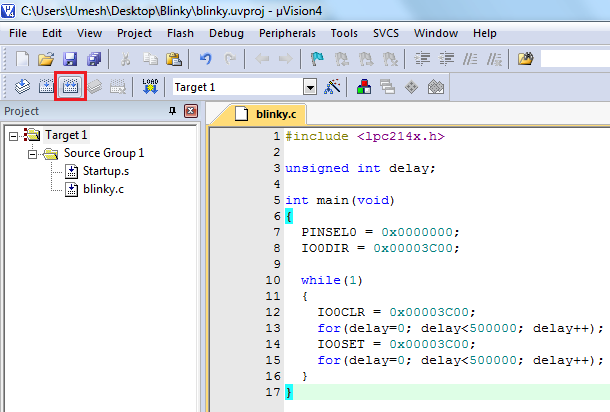
- Once we save file as blinky.c. We’ll quickly get complete code with syntax highlighted.
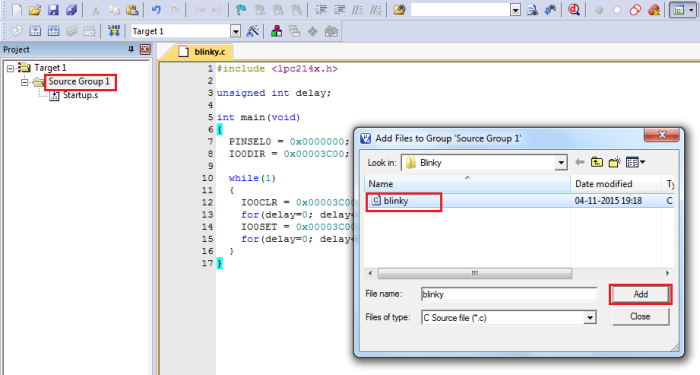
- Now we can add blinky.c file by adding it to Group Source 1.
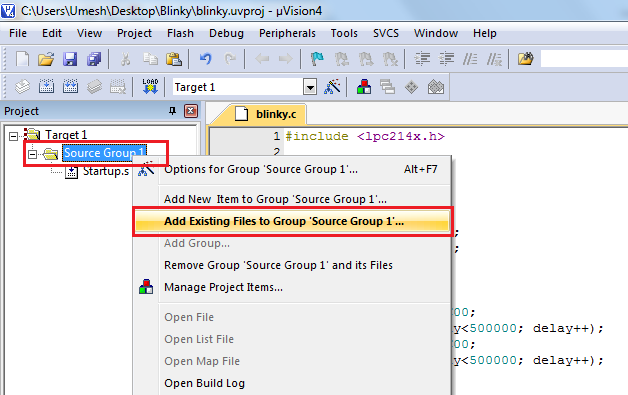
- Add blinky.c file
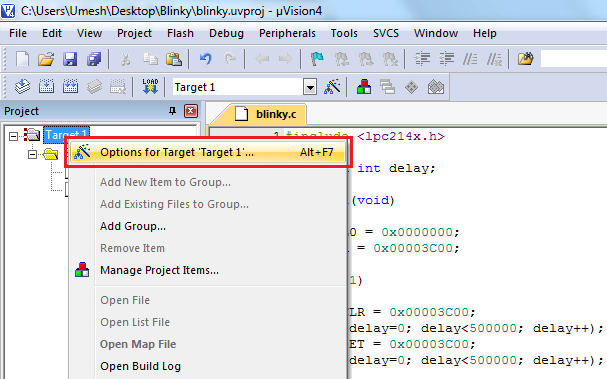
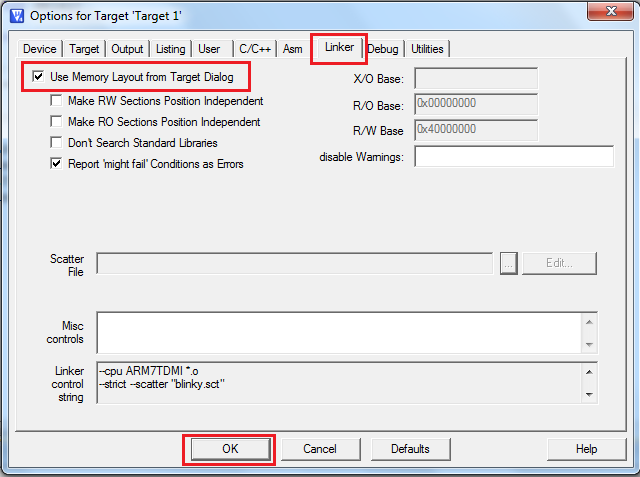
- Now right click on Target 1 and hit on Options for target “Target 1”
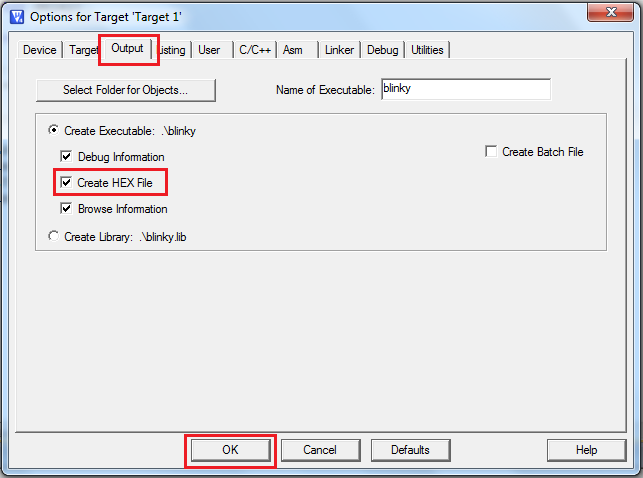
- In Options for target “Target 1”. In output tab, click on check box Create HEX File.
- Then go to Linker tab. Click on Use Memory Layout for Target Dialog
- Then hit on Rebuild All target files
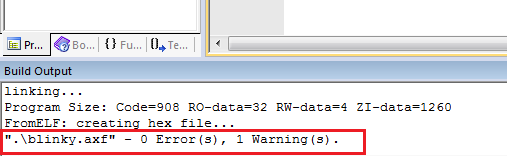
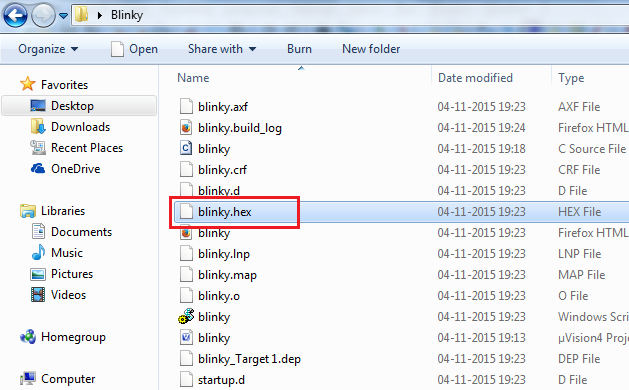
- Now we can see Build output. If we check project directory at this point. We’ll find generated HEX file. Later on we’ll use it to load or burn into LPC2148 MCU using Flash Magic.
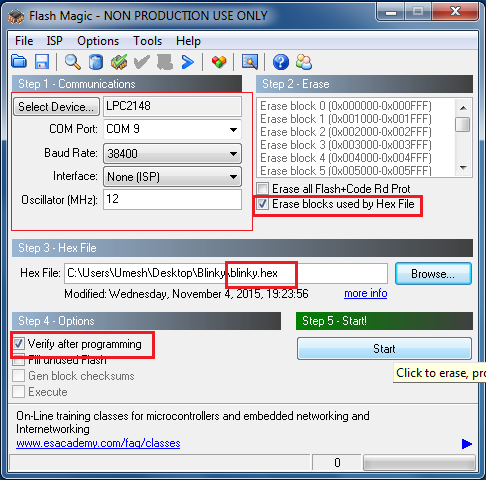
The only part left here is to setup Flash Magic and load HEX file into LPC2148 Microcontroller. Here are some pictures or I recommend you to watch video on this post to see step by step configuration and final output.
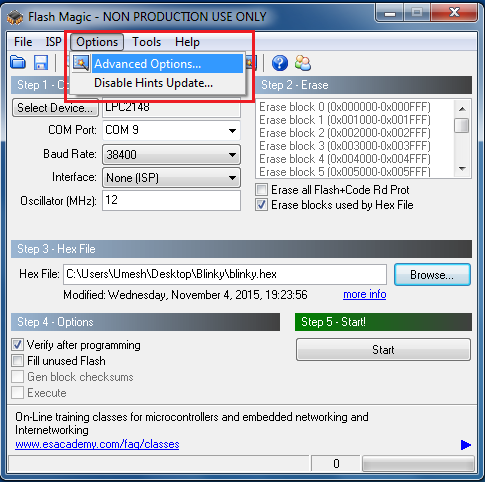
STEP-2
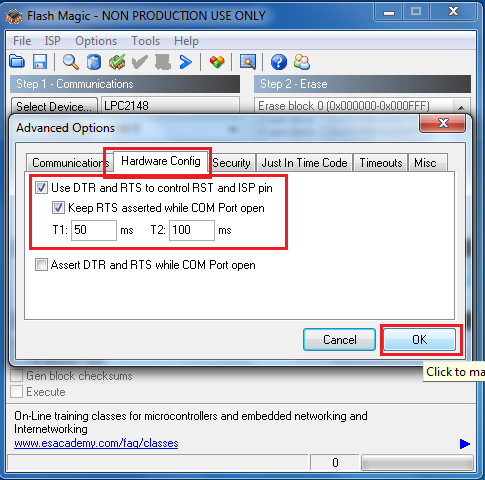
STEP-3
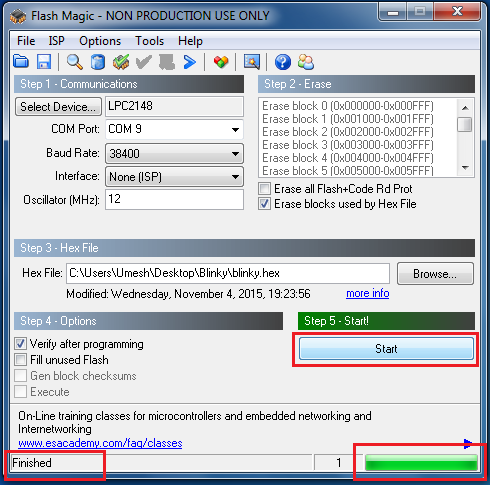
STEP-4 Finally It’s Done….!!!!
We hope this post will provide you all information needed to create new keil project for ARM7 LPC2148.