Programming AVR is easy with Atmel Studio. But same time moving to an Eclipse IDE (Integrated Development Environment) could be logical step. Eclipse has several advantages over Atmel’s provided tools. Eclipse is free IDE and you will be able to work easier and with range of tools inside the same program. So in this lesson, we’ll learn how to setup eclipse under linux for AVR Microcontrollers
Eclipse IDE is very efficient and provides great features for code reuse along with advance functions such as refactoring and code analysis. You can use Eclipse to develop software for Arduino, AVR, and ARM. These features make eclipse, programmers preferred choice to develop software for microcontrollers. In this tutorial we’ll going to setup Eclipse under Linux for AVR Microcontrollers. This is step-by-step instruction guide. This entire process tested with Ubuntu distribution of Linux. Procedure remains the same with other distributions of Linux and Mac PCs.

Downloading and Installing Eclipse & Plug-Ins
All we need is to install these two software’s:
- Eclipse C/C++ CDT
- Extreme Burner
Before we install Eclipse C/C++ CDT, on LINUX it is necessary to install the packages; however it’s not much different. We require following packages:
- gcc-avr
- binutils-avr
- avr-libc (Standard AVR C Library)
- avrdude (basic package that transfer you .hex file into MCU)
We have to manually install these packages from terminal by running following command:
Open Terminal –> sudo apt-get install gcc-avr avr-libc binutils-avr avrdude
After running command on terminal we would get installed all libraries and packages required for Eclipse to work under Ubuntu Linux. Next step is to install Eclipse C/C++ CDT and eXtreme burner (which load hex file to AVR microcontroller). Installation of Eclipse is quiet simple:
Go to Ubuntu Software Center –> search for Eclipse (Eclipse Integrated Development Environment) –> Install
Here at this point we have done with installing software components, now let’s configure Eclipse for AVR MCUs. Open Eclipse by:
From main menu find Programming –> hit on Eclipse to open application
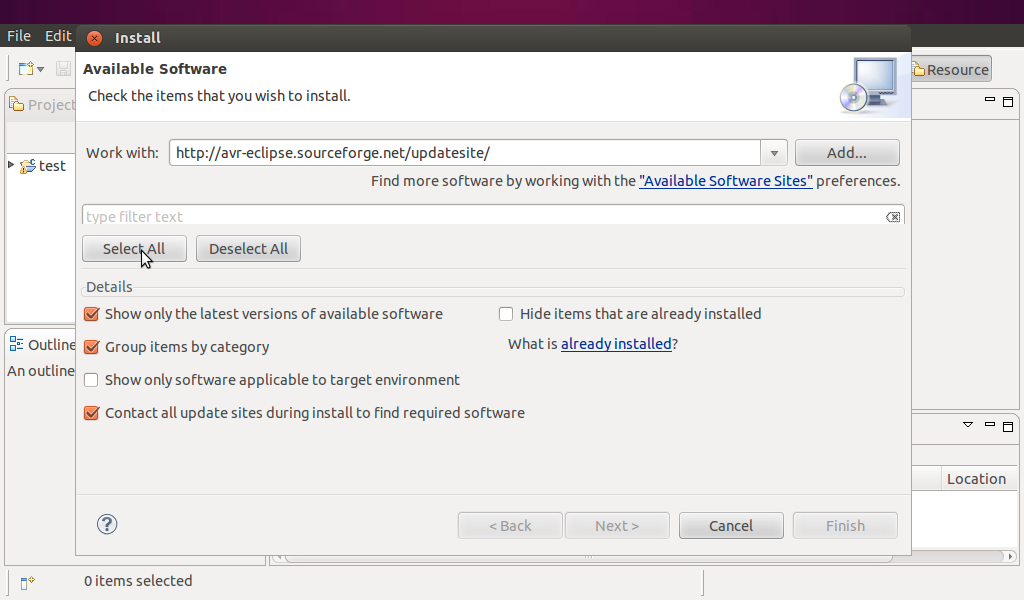
Once we open Eclipse then hit on, Help –> Install New Software… –> Insert link http://avr-eclipse.sourceforge.net/updatesite/ to work with box –> hit on Select All –> click on Next –> follow instructions until we get Finish button and hit on it.
Let’s Make Fresh New Project:
This is a step-by-step process to create fresh new project in Eclipse. After opening an Eclipse, make sure preferred location of your working directory i.e. workplace.
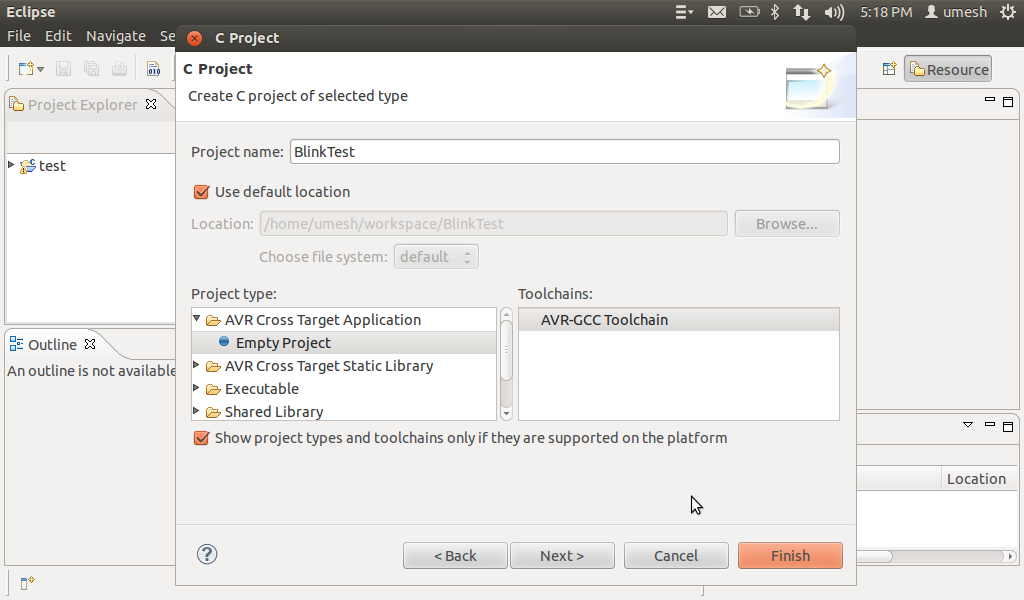
Then hit on File –> New –> Project… –> C/C++ –> C Project –> then hit on Next –> give project name BlinkTest, make sure Project Type and Toolchains has been chosen properly as shown in figure –> hit on Next –> Next –> choose MCU Type in our case ATmega32 and MCU Frequency(Hz) 1000000 –> Finish.
At this point we have successfully created new project called BlinkTest under Eclipse. Let’s add source file to write C code.
File –> New –> Source Folder –> name folder as Source (in this case) –> hit on Finish
Next step is to add C source file to project where your real task begins,
Right click on Source –> New –> Source File –> give it name, in our case its main.c –> hit on Finish

Here we’ll find C source file been created in our project directory. Let’s write simple LED blink program and test on real hardware, copy following code snippet into main.c file,
/*
 * main.c
 * Created on: 17-Sep-2015
 * Author: umesh
 */

#include <avr/io.h>
#include <util/delay.h>

int main(void)
{
  DDRB |= 1 << PINB0;
  while (1)
  {
    PORTB |= 1 << PINB0;
    _delay_ms(1000);
    PORTB &= ~(1 << PINB0);
    _delay_ms(1000);
  }
}
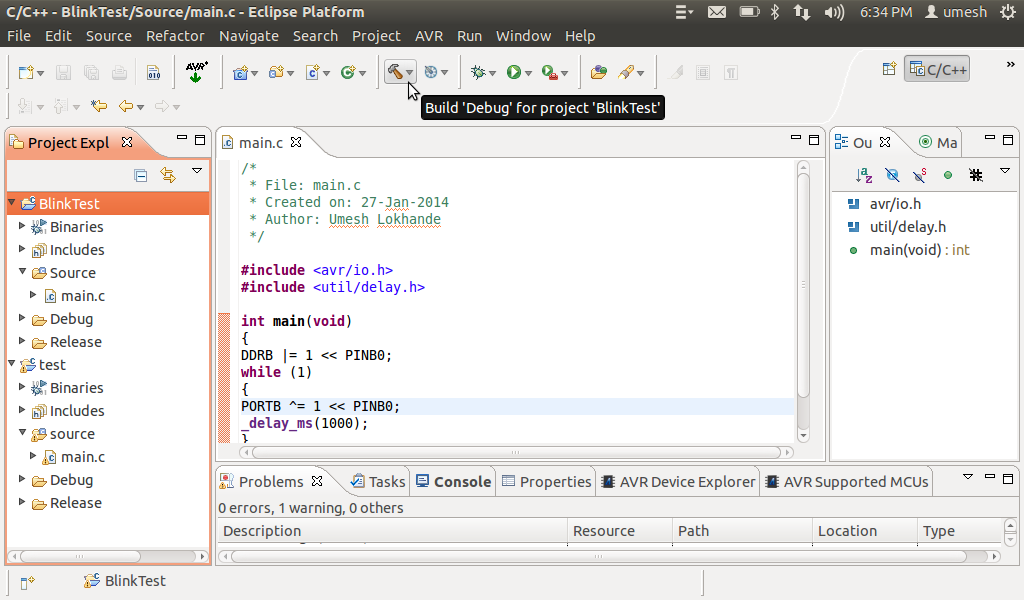
Now we have almost done everything to successfully develop software for your ATMEL AVR device in Eclipse. To build your project, simply click on the hammer in the tool bar or press Ctrl-B or Command-B. Eclipse will the compile your project and generate the necessary firmware files.
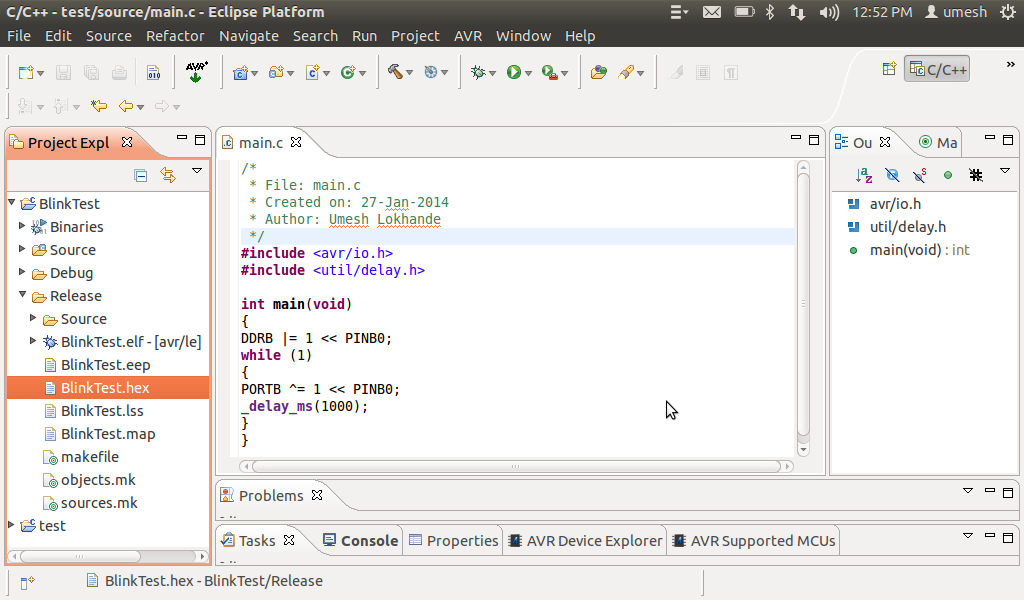
In our project folder. We’ll find file named BlinkTest.hex file to program microcontroller. Please refer figure:
Congratulation….!!! We have done with most of a part. Only thing left is to load this BlinkTest.hex file into microcontroller. Now we have to look at installation of eXtreme Burner.
Load HEX File into AVR MCU
To get installed eXtreme burner on Ubuntu Linux, we need to download eXtreme Burner from, http://extremeelectronics.co.in/avr-tutorials/gui-software-for-usbasp-based-usb-avr-programmers/
We’ll download xAVR_Ubuntu.tar.gz file. Just unpack this file on desktop:
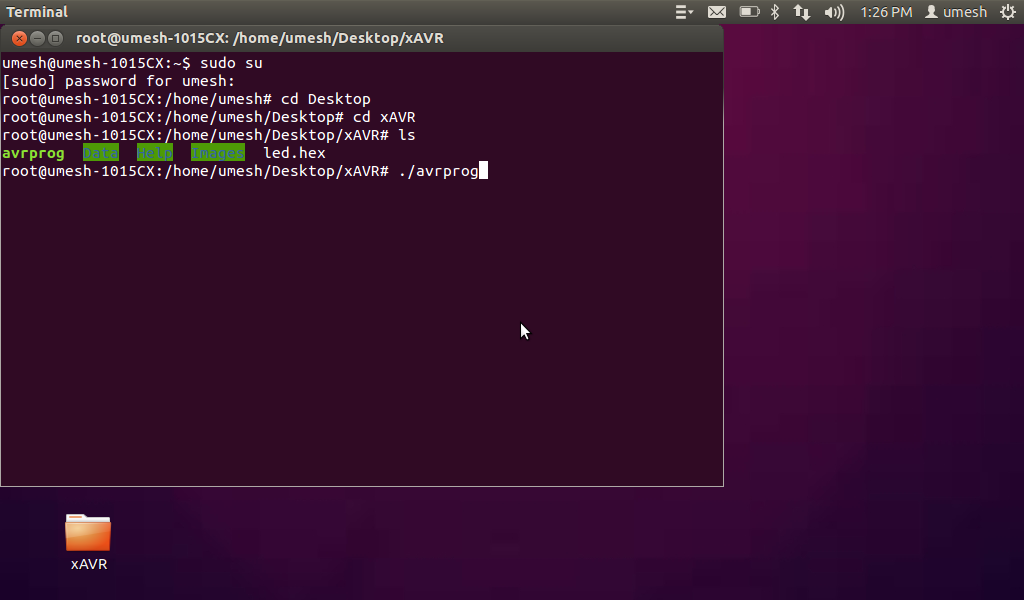
- Open Terminal and Run Command
- sudo su and then insert user password to enter into super user mode
- Go to xAVR folder on your desktop (through terminal browse xAVR folder)
- type ./avrprog on terminal and hit enter
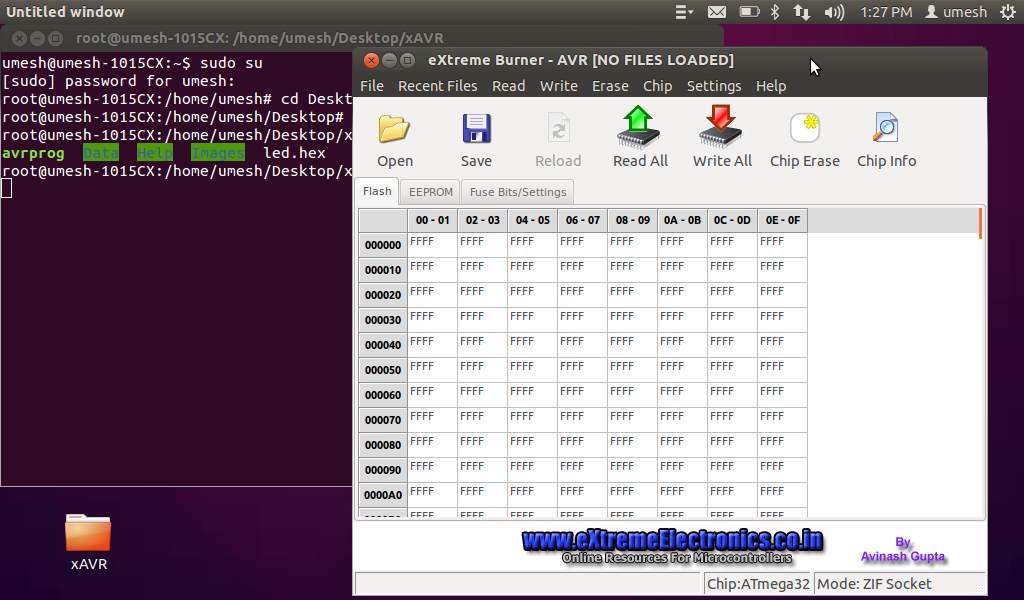
After entering this command on terminal Graphical User Interface will pop up on our screen. The interface is very easy to understand as like Windows. Please, take a reference of provided screenshots,
Finished! The rest is up to you. Now you got everything to develop AVR programs with all the comfort Eclipse offers.