In this post, we will learn How to setup Raspberry Pi 3 Model-B for Programming. As we have seen an Introduction of Raspberry Pi 3 in the previous post. Let’s get a jump start onto preparing SD Card and boot raspberry pi for first time. Now if we have new Raspberry Pi 3 then we have two choices by which we can boot. The first way is using HDMI Monitor which is easy but often time we won’t be having a monitor at our disposal. The second way is referred as headless setup in which we will connect Raspberry Pi 3 to internet router to get IP Address to access Pi over SSH Client. The one thing we need to have before we proceed any further. We must have Micro SD Card with latest Raspbian OS image. Now the question is How to prepare SD Card for Raspbian OS? So let’s make our SD Card bootable.

List of Software need to Installed
- 7Zip Program: To extract downloaded Raspbian OS Image
- SDFormatter: To format SD Card to begin initial setup process
- Win32DiskImager: To load OS Image Raspbian onto SD Card
- Advanced IP Scanner: To get IP address of Raspberry Pi
- PuTTY Client: SSH Client to access Raspberry Pi on windows
List of Components and Parts Required
- Raspberry Pi 3 Model B Kit
- Micro USB Cable
- Micro SD Card and SD Card Adapter
- LAN Cable
- HDMI Monitor, USB Keyboard and Mouse (optional)
Prepare SD Card: Setup Raspbian on Raspberry Pi 3
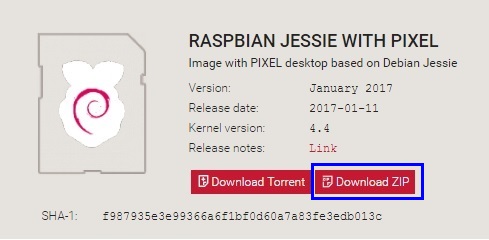
The first step to bring Raspberry Pi 3 in action is to download the latest version of Raspbian OS Image from an official web page. As shown in the picture below, we have to download a zip file and extract using 7Zip Program.
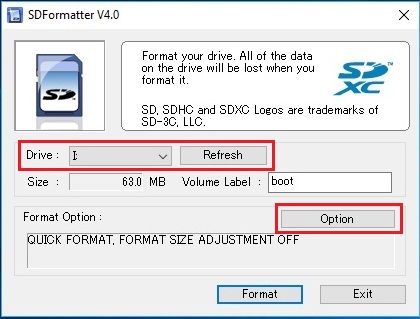
Next step is to format Micro SD Card using SDFormatter. It’s pretty simple. We recommend you to do fully format go to Options à choose Full Erase. The fully formatted Micro SD Card is ready to load Raspbian on it.
Next step is to Open up Win32DiskImager. In Win32DiskImager, we will have to browse Raspbian image and select destination drive where our SD Card is attached. Once you’re sure about the path of OS image and destination drive, then simply hit “write” button. This will take for a while to write the image onto Micro SD Card.

When process completes we will see popup box saying “write successful! Ok“. We can observe that our untitled SD Card will be referred as “boot”. This assures that our SD Card is ready. Now browse SD Card so that we can create file using notepad. Make sure to Save this newly created file with name as “ssh” (without any extension).
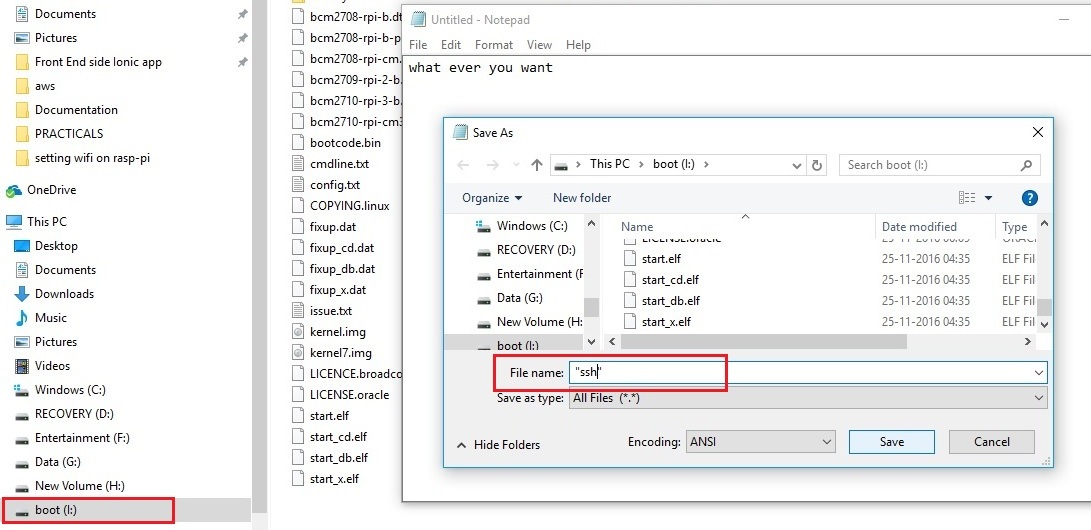

This file enables SSH access for Raspberry Pi 3 Model-B. In previous version of Raspberry Pi we need not have to do this. But later on Raspberry Pi foundation realized that many people are unaware about this file. So user won’t be accidentally exposed. Ultimately this provides a security check.
The next step is to remove Micro SD Card from Adaptor to put onto Raspberry Pi 3. To do this we recommend you to give some respect to SD Card by safely remove hardware on a windows machine.
At this point, our Micro SD Card is ready to insert into Raspberry Pi 3 (Micro SD Card Slot on the backside of Pi). Now simply insert SD Card into Pi 3. Also, connect LAN Cable between Internet Router and RJ45 Ethernet Slot of Raspberry Pi. The only thing left at this point to connect Micro USB Cable to power-up Rapberry Pi 3. So power-up Pi and observe the status of onboard leds. If everything goes fine up to this point then we will get Red LED light up and Green LED will be blinking in an interval.
We can open a browser and enter 192.168.1.1 to access router settings. The popup box will ask you to provide username and password, make sure to enter both as admin. In Router settings, you will find DHCP listing. From there we have to note the IP address assigned to Raspberry Pi 3. You can also use Advance IP Scanner to get IP Address of Pi.
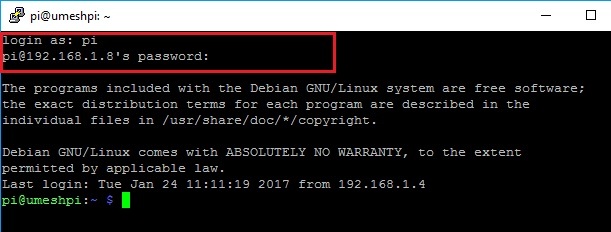
Here at this point we are ready to put Raspberry Pi into action. Now open PuTTY and enter Host Name or IP Address of Raspberry Pi in my case it’s a 192.168.1.8 and hit open button.
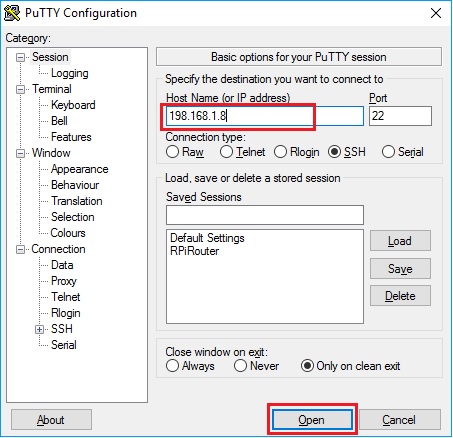
We will be presented with screen. This time we have to enter Login as: pi and Password: raspberry. And we are done with setup of Raspberry Pi 3 and initial boot process.
Live Demo: How to setup Raspberry Pi 3 Model-B
This is it for How to setup Raspberry Pi 3 Model-B for Programming. We hope this post will help you drive Raspberry pi 3 into action. In next tutorial we will see how to setup Wi-Fi network on raspberry Pi 3. If you still have any questions feel free to leave a comment. Thanks for reading.