In this tutorial, we will learn how to use Timer Interrupt in Arduino Uno. As we have already used function delay() in our previous tutorial. There are many places where unknowingly we have already used Timer feature. The reason behind that is Arduino API hide low-level hardware stuffs to make it simple for beginners to use a microcontroller in their project. Now, What is Timer? It’s a piece of hardware built onto Arduino Controller which provide time variable to our microcontroller project. This could be similar to a general clock. The Timer can be programmed by using special register but to keep things simple. We will first use existing Arduino Timer Library and later on, we’ll dive deep into actual low-level programming where we will program hardware registers on Arduino controller to setup Timer Interrupt in Arduino Uno.
Before we get into actual code let’s talk a little bit about interrupts. An interrupt is important to understand because on controller program runs sequentially i.e. (instruction by instruction). An interrupt is event that interrupts usual flow of a program and runs special Interrupt Service Routine (ISR). Once the program in ISR finished then program start executing from the point where it left off. In our both example we will toggle LED when an interrupt occurs in our program.
Example: Timer Interrupt in Arduino Uno (with TimerOne Library)
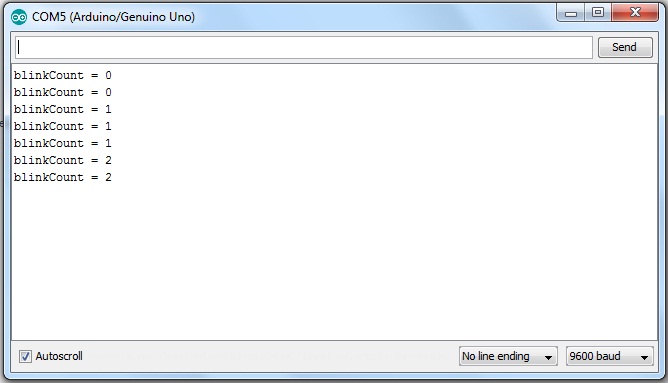
In this example, we will be using Timer Interrupt to blink a LED and keep track of how many times it has blinked. The first step is to install libraries. Let’s open Arduino IDE –> Sketch –> Include Library –> Manage Library –> Search for “TimerOne” –> Click on TimerOne and hit Install button. Now we are ready to create a project.
#include <TimerOne.h>

void setup(void)
{
  pinMode(13, OUTPUT);
  Timer1.initialize(150000);
  Timer1.attachInterrupt(blinkLED); // blinkLED to run every 0.15 Sec.
  Serial.begin(9600);
}

int ledState = LOW;
volatile unsigned long blinkCount = 0; // use volatile for shared variables

void blinkLED(void)
{ if (ledState == LOW)
  {
    ledState = HIGH;
    blinkCount = blinkCount + 1; // increase when LED turns on
  }
  else {
    ledState = LOW;
  }
  digitalWrite(13, ledState);
}

void loop(void) {
  unsigned long blinkCopy; // holds a copy of the blinkCount
  noInterrupts(); // temporarily disable interrupts
  blinkCopy = blinkCount;
  interrupts();
  Serial.print("blinkCount = ");
  Serial.println(blinkCopy); delay(100);
}

Example: Timer Interrupt in Arduino Uno (without Library)
In Arduino, the central processor is ATmega328 Microcontroller. So Arduino supports three timers (as discussed earlier). In this example, we will be using Timer 1 for our Interrupt. This is basic LED blinky exercise, but now instead of using delays it triggers interrupt which flash LED every half second to turn Led ON and then OFF, thus blink LED every second.
int timer1_counter;

void setup()
{
  pinMode(13, OUTPUT);

  // initialize timer1
  noInterrupts(); // disable all interrupts
  TCCR1A = 0;
  TCCR1B = 0;

  // Set timer1_counter to the correct value for our interrupt interval
  // timer1_counter = 64911;// preload timer 65536-16MHz/256/100Hz
  //timer1_counter = 64286; // preload timer 65536-16MHz/256/50Hz
  timer1_counter = 34286;   // preload timer 65536-16MHz/256/2Hz

  TCNT1 = timer1_counter;   // preload timer
  TCCR1B |= (1 << CS12);    // 256 prescaler
  TIMSK1 |= (1 << TOIE1);   // enable timer overflow interrupt
  interrupts(); // enable all interrupts
}

// interrupt service routine
ISR(TIMER1_OVF_vect)
{
  TCNT1 = timer1_counter; // preload timer
  digitalWrite(13, digitalRead(13) ^ 1);
}

void loop() {
  // your program
}
This is it for now. We hope now you’re familiar with Timer Interrupt in Arduino. The topic is very rich and difficult to cover in one single tutorial. We will explore other features related to timer interrupt in Arduino. We will be building some cool projects in future where we will discuss them in detail. Thanks for reading.
 BINARYUPDATES.COM EMBEDDED SYSTEMS TRAINING
